Project Time: 3D Print A Functional Continuity Tester
Submitted by Todd Atchison on Fri, 01/07/2022 - 17:18
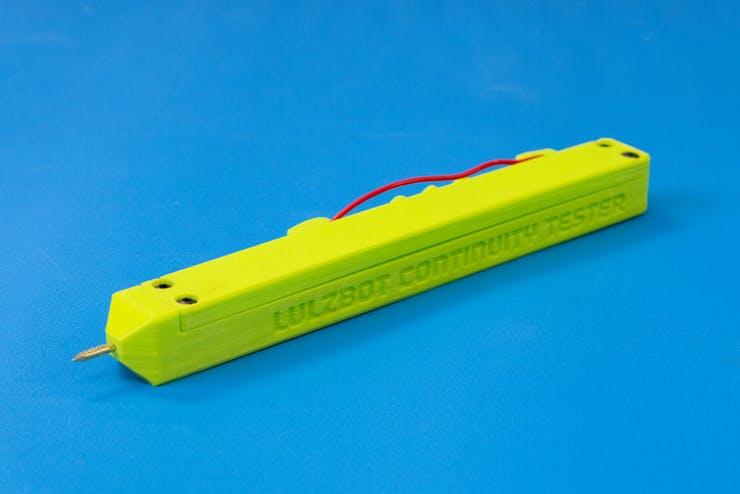
Ever need to make sure something on your 3D printer has actual continuity? Why not make yourself a continuity tester! This fully functional 3D Printed continuity tester is a great beginner project. Check out all of the details, step by step directions, download stl files and more at Hackster.io.
What You'll Need
- Visit Hackster.io for detailed instructions, materials, and files.
- LulzBot 3D Printer
- Long nose plier
- Lead free solder
- Wire stripper/cutter
- Continuity Tester .stl files part 1 and part 2
- 1x 3mm green LED
- 1x 47 ohm through hole resistor
- 1x Brass finishing nail
- 1x AA battery
- 1x AA Semicircle Battery +/- conversion spring 12mmx12mm
- 1x 20 AWG wire
- 4x M4 6mm button head screws
_pP9EgNALeU.jpg)
Assembly
Step 1:
Gather your materials and print out the casing with the provided STL's. We recommend a stronger filament like PETg but a PLA should be fine if that's what you have on hand.
Step 2:
Cut the heads off of the brass nails and insert one into the end of the printed main body until at least 3mm protrudes into the well. Placing the nail into a cordless drill makes this step easier as it heats the plastic up a little which also provides some stability to prevent slipping after it cools back down.
Step 3:
Place the LED in the provided slot with the positive lead pointed towards the brass nail. Trim the lead accordingly and solder to the brass nail.
Step 4:
Take the battery plate with the spring pinch locking tabs. With a pliers hold the battery plate and bend the soldering tab 90 degrees toward the spring. Trim resistor leads to 12mm, solder one resistor lead 90 degrees to the battery plate with spring.
Step 5:
Cut 100mm of the 20 AWG stranded wire, strip 5mm of insulation off both ends. Then solder one end of the wire to the open lead of the resistor. Slide the battery plate with spring into the negative plate slot provided in the plastic body. Then push the other end of wire into the hole at the bottom of the positive plate wall coaxing the wire into the channel. Solder this to the end of the wire and negative lead of the LED. Trim excess wire and LED lead.
Step 6:
Bend the solder tab of the positive battery plate 90 degrees away from the bump. Using another length of 20 AWG wire approximately 2 to 3 feet long, strip 5mm of insulation off both ends. Solder one end of wire to the positive battery plate. Make sure it’s in-line with the tab. With pliers, pinch down the locking tab of the positive battery plate and place the plate into its slot.
Step 7:
Run the wire through the hole in the wall of the body nearest the LED. Place a tie wrap on the wire at the inside wall to provide a strain relief, tying a knot in the wire also works. Solder the other brass nail to the other end of the long wire and wrap the wire around the wire wrap on the exterior of the print.
Step 8:
Add the batteries and screw down the cover with the (4) M4 6mm button head screws. Now you can test your Continuity Tester!
Visit Hackster.io for detailed instructions, materials, and files for this project and others.
Hackster.io, an Avnet community, is the world's largest network for hardware and software developers with 1.8M+ members.
WARNING & DISCLAIMER: Products and designs such as those shown in this tutorial can be dangerous. This tutorial and its contents are intended to be used for informational and educational purposes only, and by using or relying on this tutorial or its contents in any way, you expressly assume any and all risk associated therewith. LulzBot and FAME 3D makes no claims, representations or warranties, either express or implied, as to the safety, reliability, durability, or fitness for a particular purpose of any design, material, product, creation, or item you may use or generate based in whole or in part on this tutorial. Individual results may vary depending on unknown variables, including but not limited to, each user’s hardware, software, materials, environment, experience, and actual or intended usage of the design, product or creation. In no event shall LulzBot or FAME 3D be liable whatsoever for any direct, indirect, punitive, incidental, special or consequential damages, to property or life, arising out of or connected with the use or misuse of this tutorial, its contents, and any action you choose to take based thereon.