
While your LulzBot 3D Printer is designed to use 3mm (2.85) filament by default, it is possible to print with 1.75mm filament with no hardware modifications. While we recommend and support 3mm filament, advanced users have had some success with a bit of patience and settings adjustments, so we've created a guide specifically for 1.75mm 3D printing filament help.
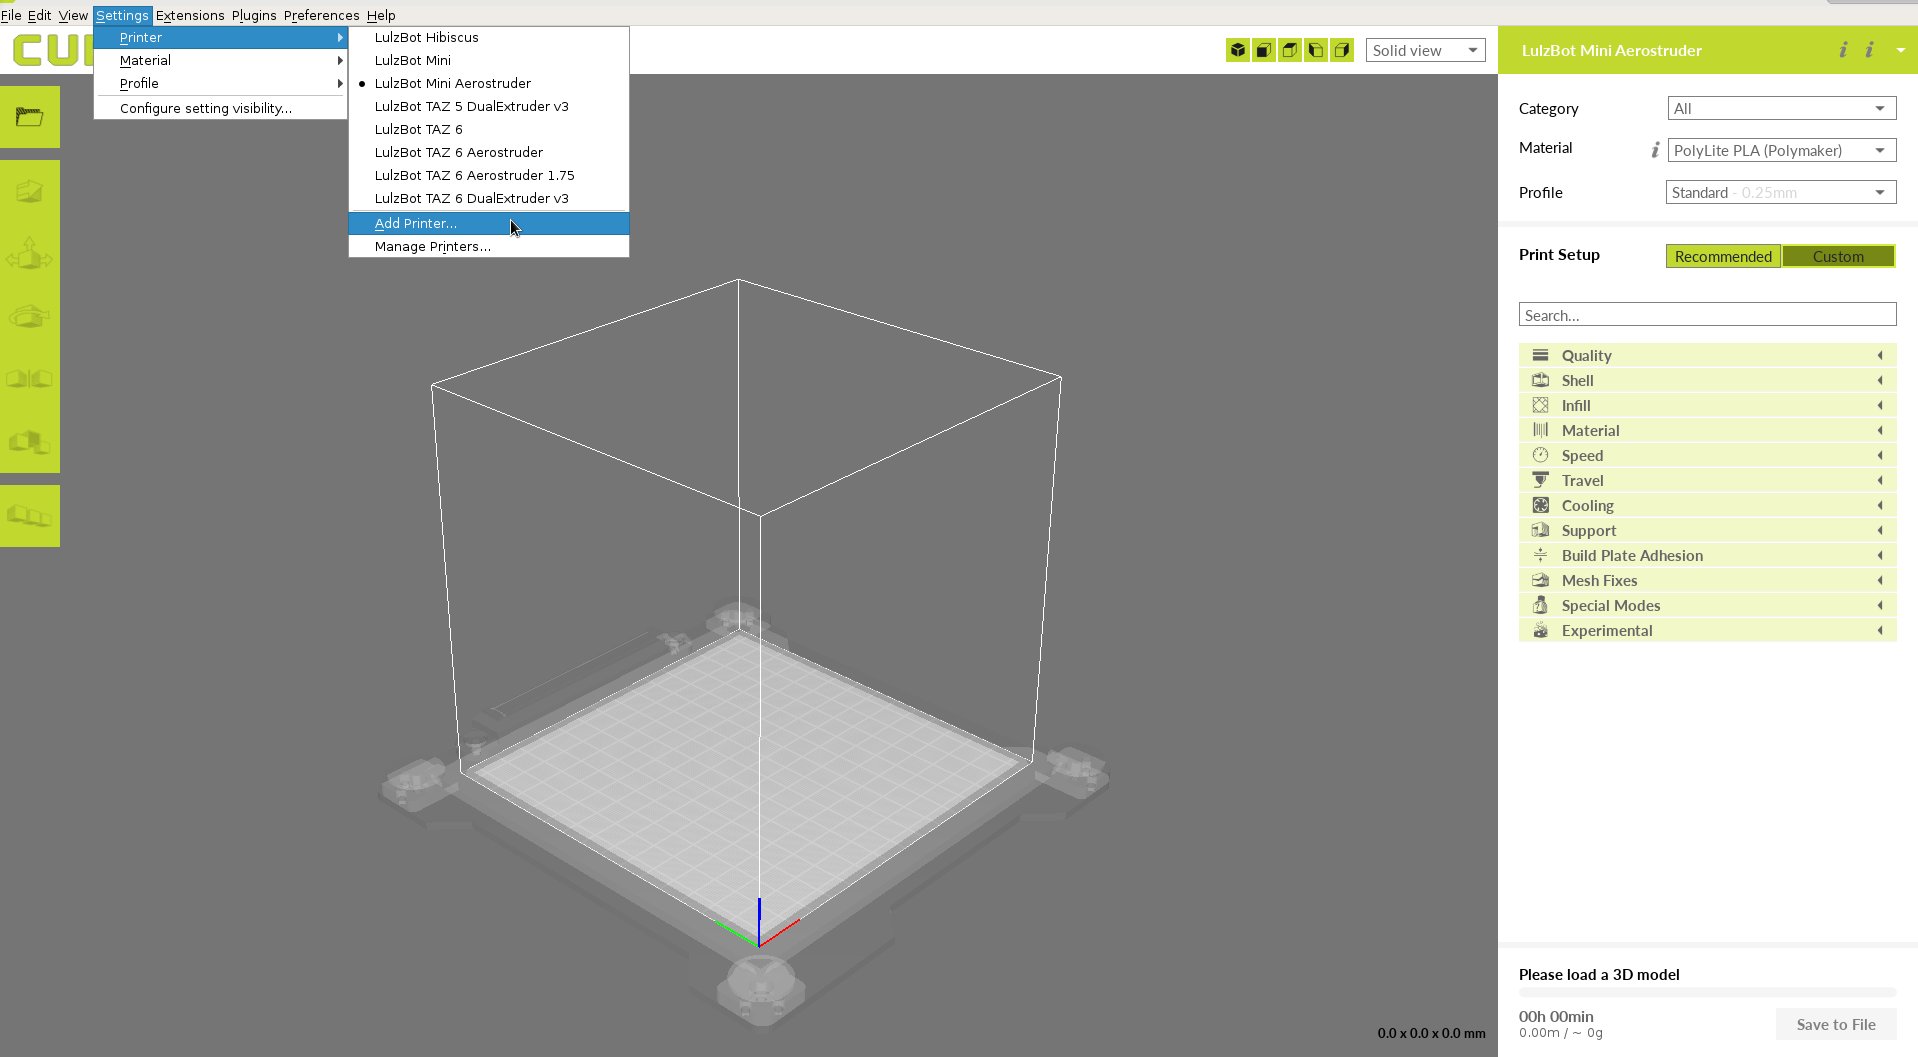
1. Open Cura LE. In Settings, select Printer, and then Add Printer. Choose the printer and tool head combination you are printing with and re-name the selected printer (example: Mini2-1.75) so these settings will be kept separate when you decide to switch between 1.75mm and 3mm filament.

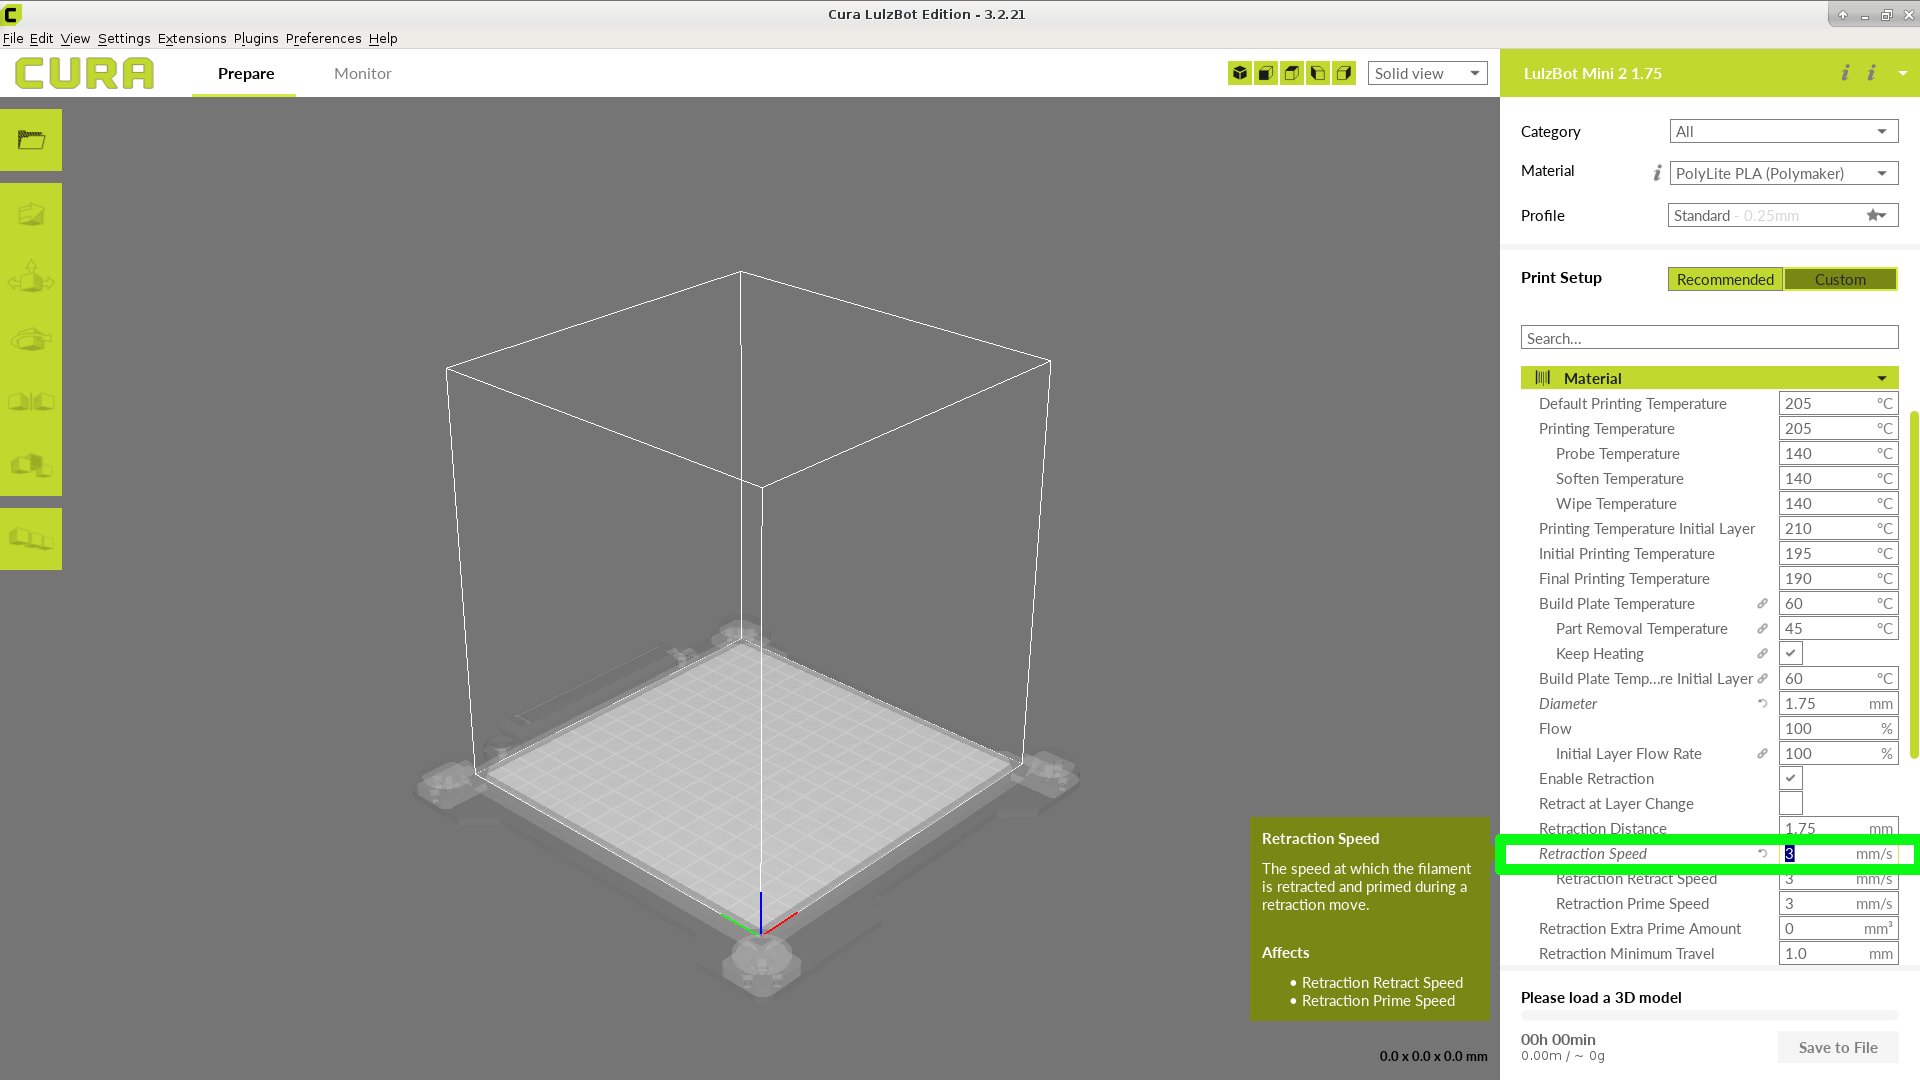
2. Go to Custom settings, and under the Material setting, change the Diameter from 2.85mm to 1.75mm.

That's it! This is all it takes to get a good baseline 1.75mm filament print on a LulzBot 3D Printer. Follow the tips below to help further improve print quality and machine performance.
Filament suggestions:
In general, the more rigid the 1.75mm filament is, the better luck you will have printing it with stock LulzBot tool heads. We have tested numerous brands of 1.75mm PLA and PLA composites with great results. On the flip side, we can say that TPUs and polyamides (nylons) will always buckle in the filament path and cause print failures. Materials like ABS and PETG can be printed, but with less reliability than PLA.
Settings suggestions:
With 1.75mm filament, there is less material in the hot end and less pressure required to melt it, so there is also less ooze. Try reducing the speed and distance of your retractions. This will also limit the tendency of the filament to bend and buckle in the filament path, the most common cause of print failure with 1.75mm filament. These options can also be found under the Material setting. Retraction distance varies by material, but try cutting the default value for your material in half. A retraction speed of 3 mm/s yielded the best results for most materials. (The default setting is 10 mm/s.)
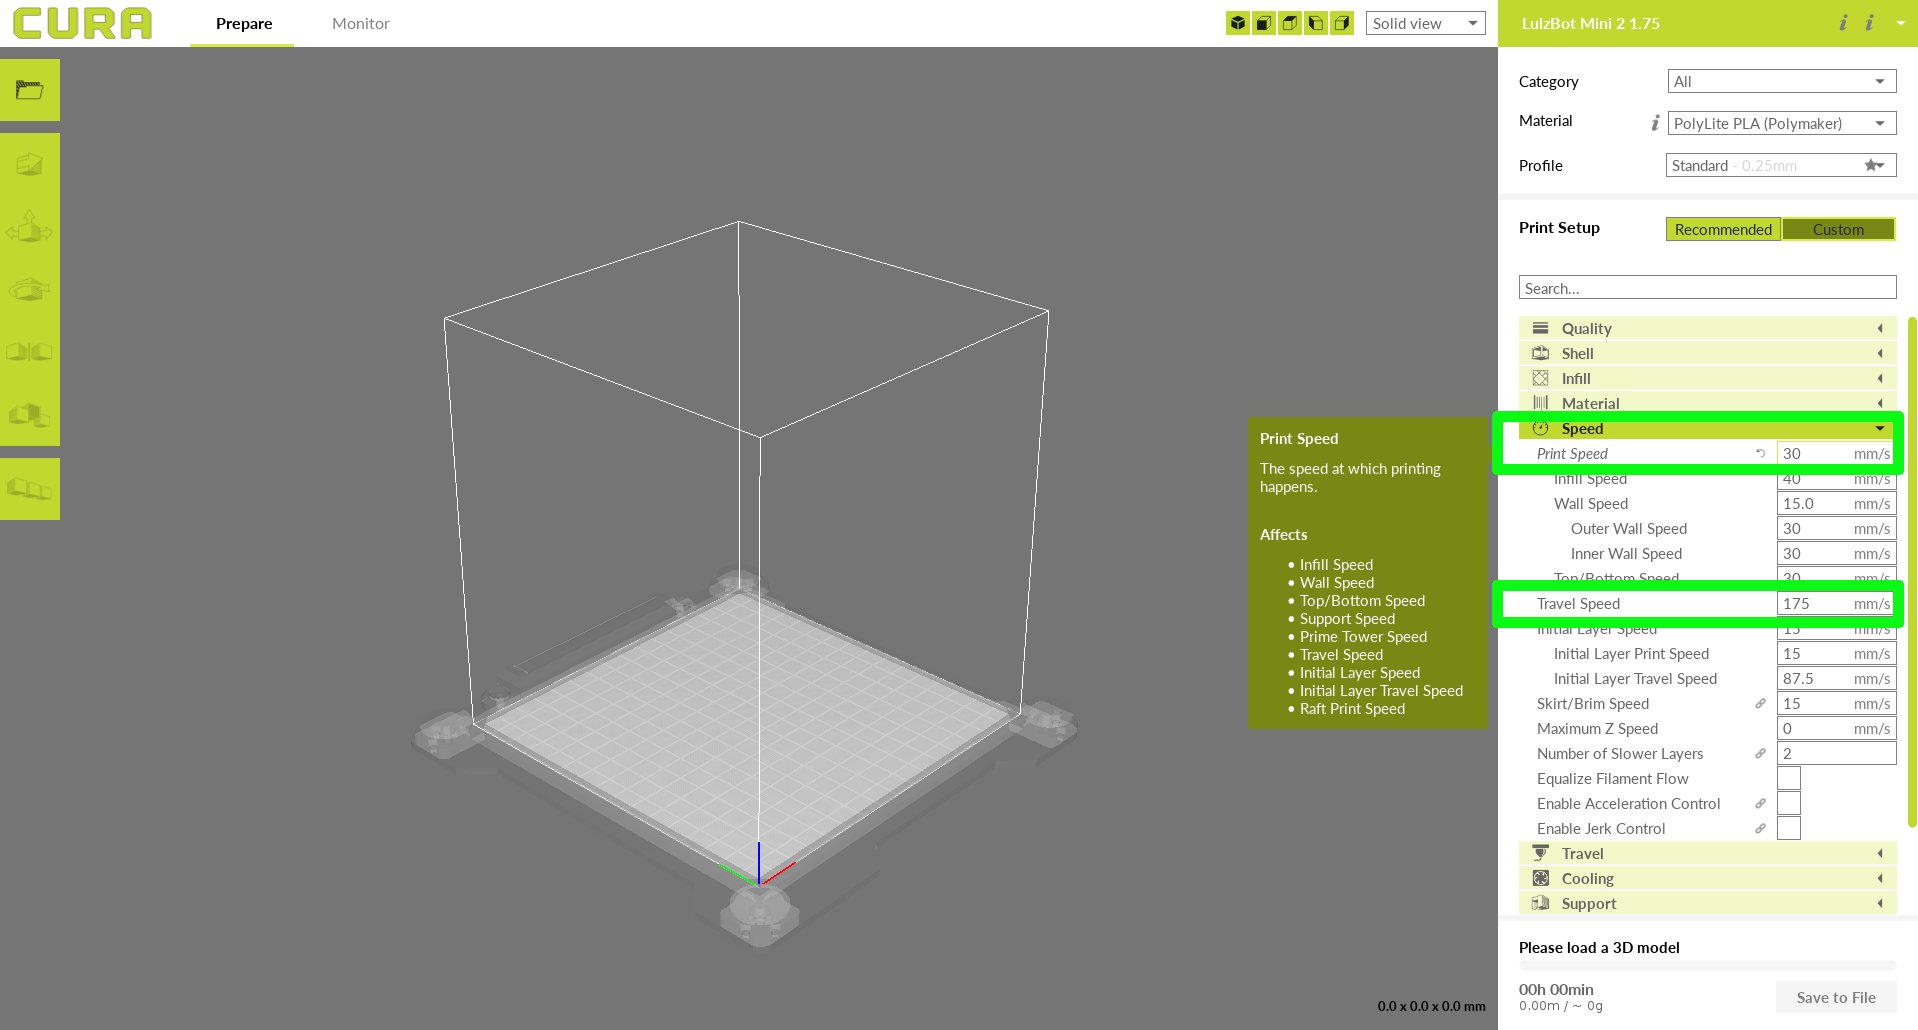
Reduced speed helps the feed: slowing down the printing speed by about 50% also compensates for the reduced rigidity of the thinner material for better reliability. Reducing the travel speed from standard 175 mm/s to 150 mm/s helps eliminate stringing and oozing by giving the filament more time to cool during travel.
Important!
The likelihood of filament feeding problems and extrusion issues is increased by using 1.75mm filament. To mitigate this, after each print, heat up the nozzle to 220-225 and extrude about 30 mm of filament to ensure that it is still flowing smoothly, and there is no blockage in the nozzle. If no filament extrudes, remove the 1.75mm filament from the extruder. Load a piece of 3mm filament, preferably the same material type, into the tool head and extrude about 30 millimeters through the hot end. This removes any extra build up or folds from the heating chamber.
Discover any additional tips or tricks? Post them on our forum, and share your success stories on social media! (Links in the footer)